Removing Backgrounds From Glass and Transparent Products
Glass, bottles and clear plastic are the hardest things to cut out, because the edge is ambiguous and you can see the background through the product. Here is how the transparency-preserving mode handles them, how to shoot for it, and where it still needs a hand.
By Novus Stream Solutions Editorial Team · Part of the Browser-local editing workflows topic cluster
Glass is the case that breaks ordinary background removers. A wine bottle, a perfume flacon, a clear plastic bottle of shampoo: you point a cutout tool at it, and one of two things goes wrong. Either the mask treats the whole shape as opaque and deletes everything you could see through the glass, or it hedges and leaves a grey, foggy halo where the edge should be crisp. Neither looks like a product photo. Both look like a mistake.
This is a practical guide to getting a clean cutout of transparent products using Glass mode in the NSS Background Remover, what the mode actually does, how to shoot so the mode has a fighting chance, and where you'll still need to finish by hand. Everything here runs in your browser; your photos never get uploaded.
Why transparent products are the hard case
Most cutouts rely on a simple idea: every pixel is either subject or background. A person's shoulder is opaque, the wall behind them is not, and a good mask draws the line between them. That assumption is what makes ordinary background removal work at all.
Glass breaks the assumption twice over.
- The interior is genuinely see-through. You can see the backdrop through the bottle. If the tool marks those pixels as "subject" it keeps a frozen copy of your old background trapped inside the glass. If it marks them as "background" it punches a hole clean through the product.
- The edge is ambiguous. The rim of a clear glass, the shoulder of a bottle, the lip of a jar, these are where refraction, reflection and the backdrop all pile up in a few pixels. A hard binary mask has to guess, and it guesses badly, which is where the grey fringe comes from.
If you want the deeper version of why a mask can be technically "correct" and still look pasted-on, we wrote about that in segmentation vs matting. The short version: transparent products need the tool to treat "partly see-through" as a real answer, not round it to fully-kept or fully-gone.
What Glass mode actually does
Glass mode is a transparency-preserving post-processing pass, not a separate model. That distinction matters, so let's be precise about it.
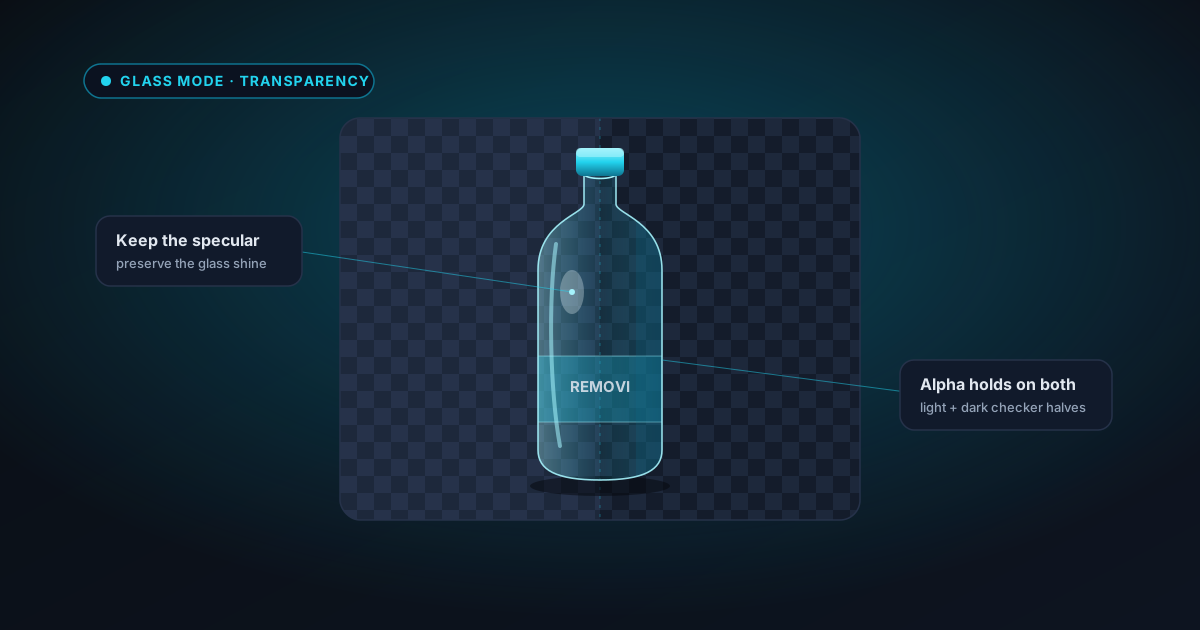
You still run one of the normal background models to find the product. Glass mode then works on the alpha channel that model produced. Instead of forcing every pixel to fully opaque or fully deleted, it preserves the see-through interior: the parts where the backdrop shows through the glass stay partly transparent rather than getting flattened one way or the other. The result is a cutout where the product reads as glass: you can drop it on a new background and light passes through it, instead of it looking like a solid silhouette or a bottle full of the old studio wall.
Because it's a pass and not a different engine, you turn it on alongside your chosen quality mode rather than switching to some separate "glass tool". Two things follow from that:
- It works with the whole product, not just the obvious clear panel. Labels, caps and opaque bases stay solid while the clear body stays see-through.
- It can only work with the information in your photo. If the shot doesn't distinguish the glass edge from the backdrop, no post-pass can invent that distinction. Which is why the shoot matters more here than for any other subject.
Shoot so the mode can do its job
You will save far more time at the camera than in the editor. The goal is a photo where the boundary between "glass" and "background" is actually visible to a model. Our companion guide on photographing glossy and reflective products covers the lighting rig in detail; here's what specifically helps a cutout.
Use a clean, gently graded backdrop. A smooth white-to-grey gradient, or a plain sweep, gives the edge somewhere clean to sit. A busy backdrop shows through the glass and gets baked into the interior, and there is no way to separate it later.
Control your reflections. Glass is a mirror as much as a window. Every lamp, every bright window, every white shirt you're wearing shows up as a hard hot spot on the surface. A hard specular reflection reads to the tool as opaque product, so it stays behind after the cut: a bright smear with no bottle around it. Flag your lights, shoot through a scrim, and kill stray reflections at the source.
Backlight clear liquids. A bottle of water, gin or clear oil almost disappears against a bright field, and its edge vanishes with it. A controlled light behind the product renders the liquid and the glass wall as a clean, readable rim. That rim is exactly what Glass mode needs to trace.
Give the edge contrast. If your product is clear glass on a white sweep, the left and right edges can fall to nearly the same tone as the background. A subtle graduated backdrop, or thin dark gradient reflectors either side of the bottle, draw a faint dark line down each edge. That line is worth more than any slider.
| Shooting choice | Why it helps the cutout |
|---|---|
| Graded / plain backdrop | Nothing busy gets trapped inside the glass |
| Flagged, diffused lights | Fewer hard reflections left behind as opaque blobs |
| Backlight for clear liquids | Renders an edge the tool can actually find |
| Edge reflectors / gradient | Separates glass rim from a same-tone background |
| Product wiped clean, no fingerprints | Dust and smears become stray specks in the alpha |
The workflow, step by step
Once you have a decent frame, the sequence is short.
- Load the image into the Background Remover and choose Best Quality. Best Quality uses BiRefNet-lite, the model with the most accurate edges. Exactly what you want on an ambiguous rim. Fast mode is fine for opaque subjects, but glass isn't the place to save a few seconds.
- Turn on Glass mode. This applies the transparency-preserving pass so the see-through interior survives instead of being filled or punched out.
- Run it, then check the result against both a light and a dark background. Set the cutout against a pale field and then against a dark one. This is not optional for glass. A halo or a milky interior that hides against white jumps out instantly against black, and a thin dark fringe does the reverse. Check both before you trust the cut.
- Refine the rim with Refine edges → Crisper. The Refine edges second pass has two presets. For hair you'd pick Softer; for a glass or bottle rim you want Crisper, which tightens the hard product edge and cleans up the shoulder. Apply it and re-check on both backgrounds.
- If the first pass looks uncertain, retry. When a result comes back with obvious background left behind or soft, unsure edges, the tool suggests a one-click Retry Best Quality. It never silently swaps models on you. It asks, you decide. If you started in Fast for some reason, this is the moment to take the offer.
For a single hero bottle that's usually the whole job. If you're cutting out a whole shelf of products, the batch queue processes them together and Export all as ZIP bundles every cutout into one download.
Where it still needs your hand
Glass mode gets you most of the way on a well-shot product. It does not solve everything, and it's worth being direct about the two cases it can't fully handle on its own.
- Heavy mirror reflections. A big, hard specular blow-out, a window reflected across the whole front of a bottle, is a region with no product detail underneath. The pass has nothing to reconstruct there, so a strong reflection can survive as an opaque patch or leave a scar when removed. You fix these by hand in the image editor, painting the region out on the layer. Getting the reflection under control at the camera is far cheaper than repairing it later.
- Printed-through logos and back labels. When you can read the back label through the front of a clear bottle, that back-label ink sits visually inside the glass. The tool can't know whether you want it kept as part of the product or cleaned away as background bleed. That's a judgement call, and it's a manual touch-up in the editor.
Neither of these is a failure of the mode so much as a limit of what any cutout can infer from a flat photo. When the pixels are ambiguous, someone has to decide what they mean, and for these two cases that someone is you.
Try it on your hardest bottle
Pick the shot that's beaten every other tool (the clear bottle, the perfume flacon, the tumbler of water), and run it through Best Quality with Glass mode, then Refine edges Crisper. Check it against both a light and a dark background before you commit. If the result still isn't there, the answer is almost always in the lighting, not the software.
Start with your trickiest product in the Background Remover. It runs entirely on your device, nothing is uploaded, and when you close the tab the session is gone.
Applies to NSS Background Remover v2.0.0 — the release that was current when this article was published.
Was this article helpful?
Your answer is saved in this browser only. This control makes no network request and does not send the answer to an NSS feedback endpoint.