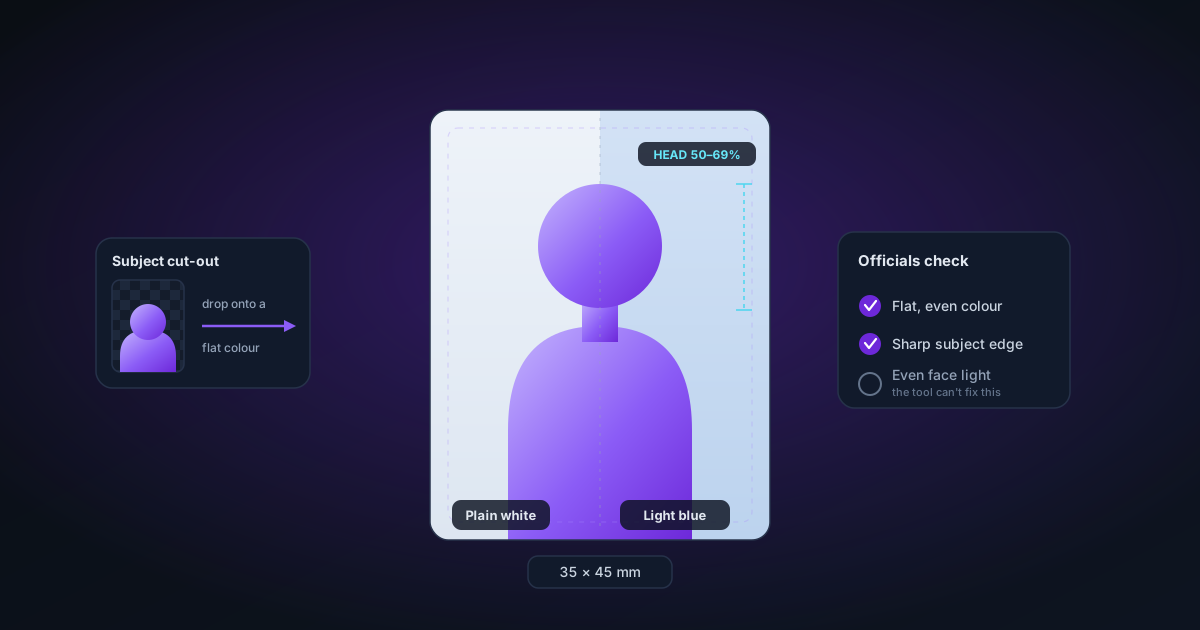
Passport and ID Photo Backgrounds: Getting the Plain White or Blue Right
A home passport photo usually fails on the background, not the face. Here is what officials check, how to replace a wall with a compliant flat colour, and where a tool cannot help.
By Novus Stream Solutions Editorial Team · Part of the Browser-local editing workflows topic cluster
The online checker rejected it in under a second. Not the expression, not the light on your face, those were fine, but the wall behind you was a faint magnolia with a light switch just visible over one shoulder, and a soft shadow pooled where your head met the plaster. Background not uniform. Please try again.
That is the pattern. The background is the single most common reason a home-shot passport or ID photo gets bounced, and it is also the part people assume they got right because the wall "looked white" at the time. It rarely photographs white. It photographs cream, or grey, or faintly blue, with a shadow you never noticed until a machine drew a red box around it.
The good news is that the background is fixable at your desk. The important news is that fixing it responsibly means knowing exactly what you are allowed to change, and what you must leave completely alone.
What officials actually check
Automated checkers and human reviewers are looking at far more than the backdrop. A photo can have a perfect background and still fail. In broad terms, expect scrutiny of:
- The background itself: plain, a single light colour, evenly lit, with no patterns, objects, other people, or shadows behind the head. The exact colour required depends on the country and the document.
- Head size and position: your head must fill a specified proportion of the frame, be centred, face the camera straight on, and sit within a defined size band. This varies between authorities and is measured precisely.
- Expression and eyes: usually neutral, mouth closed, both eyes open and clearly visible, looking directly at the lens. Some authorities now permit a natural, closed-mouth smile; many still do not.
- Glasses: increasingly not allowed at all. Where they are, no glare and nothing obscuring the eyes.
- Head coverings: generally only for religious or medical reasons, and the full face must remain visible.
- Lighting on the face: even, with no shadows across the face, no red-eye, and no blown-out or muddy exposure.
- Recency and print specs: an exact pixel size or print dimension, a minimum resolution, and often a rule that the photo was taken within a recent window.
- No alterations: the photo must be a true, current likeness. Digital edits that change how you look are prohibited.
That last point is the one that governs everything below, so hold onto it.
Why the background is where home photos fail
Walls are almost never the flat, uniform colour they appear to be. Up close a camera records skirting boards, sockets, picture rails, faint texture, and a colour cast thrown by whatever light is in the room. Your phone's automatic white balance then shifts that colour again, so a genuinely white wall can come out warm cream under a bulb or cold blue near a window.
Shadows are the other culprit. Stand close to a wall with a single light source and your head casts a dark halo onto it. Booth photos avoid this by lighting the backdrop separately and standing you well clear of it, something most hallways cannot replicate.
So even a careful home photo tends to arrive with a tinted, textured, faintly shadowed background. That is a background problem, not a face problem, which is precisely why it is the safest thing to correct.
Which colour: white, off-white, or blue
There is no universal answer, and guessing is how photos get rejected twice.
Many Western passports (including a number of European, North American, and Commonwealth documents) call for a plain white, off-white, cream, or light grey background. A range of national ID cards and some visa photos instead specify a defined blue. A few want light grey specifically, not white.
Do not assume, and do not copy what a friend from another country used. The required colour is written into each authority's photo guidance for each document. Find that guidance, note the exact wording, and match it. "Light and plain" is not good enough when the rules say "white" or "light blue".
The safe background-replacement workflow
The principle here is minimal intervention: shoot as well as you can, then change only the backdrop.
- Get the source right first. Even, soft light on your face. Stand an arm's length or more from the wall to keep shadows off it. Head straight, neutral expression, hair back from the eyes. The better the original, the less you touch, and the more the result looks like an honest photo rather than an edited one.
- Remove the existing background. Load the photo into the background remover on the homepage. It runs entirely in your browser. A photo of your own face never leaves your device, which is the point of doing this at home rather than uploading your likeness to a server you do not control.
- Place a flat, compliant colour behind you. In the image editor, drop a solid fill of the exact colour the document requires (a true white, or the specified blue) as a single flat layer. No gradient, no texture, no vignette. Officials want uniform; give them uniform.
- Inspect the hair edges closely. This is where an automatic cut-out can betray you. Zoom in around the hairline and shoulders and look for a coloured fringe, a faint halo of the old wall, or hair that has been chewed into a hard, unnatural edge. A ragged or haloed edge can make a photo read as manipulated. If the edge is poor, re-shoot against a cleaner wall rather than force it.
- Crop and size to spec. Still in the image editor, frame the head to the required proportion and set the final dimensions. Get the head-size band right: a compliant background will not rescue a head that is too large or too small in the frame.
- Run it through an official checker. Where the issuing authority provides one, use it. Better to be told no by the checker than by the office weeks later.
One distinction worth drawing: this is not the same as blurring a background. A passport photo needs a hard, flat replacement with the subject fully sharp: the opposite of the soft, defocused look people apply to portraits. If you are weighing the two techniques for other photos, portrait blur versus background removal walks through when each one is the right tool. For compliance work, blur is never the answer.
What this tool will not do
Be clear-eyed about the limits, because the stakes here are a rejected application or worse.
- It will not make your photo compliant. It changes the background and nothing else. Head size, expression, glasses, head coverings, and the lighting on your face are entirely on you.
- It cannot guarantee acceptance. No third-party tool can, and anything that promises a "guaranteed pass" is overselling. The only verdict that counts is the issuing authority's.
- Some authorities forbid digital editing altogether. If the guidance requires an unaltered photo, a digitally replaced background may itself be grounds for rejection. In that case, do not edit. Hang a plain sheet in the required colour, stand well back from it, and re-shoot.
- Never touch your face or appearance. No skin smoothing, no slimming, no removing a spot, no whitening teeth or brightening eyes. Removing a blemish that will be gone next week still changes your likeness in the eyes of many authorities, and that is the line between fixing a background and falsifying a document. Do not cross it.
Finally, and this cannot be repeated too often: requirements differ by country, by document, and over time. Verify every specific (colour, head size, expression, glasses, recency, dimensions) against the official guidance for your document, and use an official checker where one exists.
Before you submit: a quick check
- Background is a single flat colour, and it is the exact colour your document specifies
- No shadow, object, or fringe of the old wall behind the head
- Hair edges look natural at full zoom: no halo, no hard-chewed outline
- Head size, position, and frame dimensions match the official spec
- Expression, eyes, glasses, and head coverings all meet the rules
- Your face and appearance are completely unedited
- You have confirmed the current requirements on the official source, and passed the official checker if there is one
Fix the wall. Leave the face. Verify everything.
Applies to NSS Background Remover v1.9.0 — the release that was current when this article was published.
Was this article helpful?
Your answer is saved in this browser only. This control makes no network request and does not send the answer to an NSS feedback endpoint.