Selling a Car Privately? Clean Up Your Listing Photos
A cluttered driveway makes a well-kept car look scruffy. Here's a private-seller shot list, a background clean-up workflow, and where AI cutouts fall apart on wheels, mirrors and aerials.
By Novus Stream Solutions Editorial Team · Part of the Publishing and marketplace requirements topic cluster
A 2015 Focus with fresh tyres, a full service history and one careful owner can still look like a £600 banger if there's a wheelie bin, a coiled hosepipe and next door's trampoline crowding the frame. The car is fine. The photo is doing it a disservice.
Buyers scroll fast. On Facebook Marketplace or a Craigslist grid, your listing gets a fraction of a second before someone flicks past. A clean, uncluttered shot buys you an extra beat of attention, and that beat is where the buttons and the mileage and the price actually get read.
This is worth getting right because a private car sale is a big-ticket transaction built almost entirely on trust between two strangers. The photos are the first trust signal. Clean framing helps. Deception does not, and there is a firm line between the two that we will come back to.
Why the background is doing more work than you think
A house sells partly on the neighbourhood; a car sells on the car. When the background is busy, the buyer's eye has to do work to separate the vehicle from everything behind it, and a tired brain reads that friction as "scruffy". Kerbside clutter, other cars half in shot, a bin day skyline, harsh midday shadows across the bonnet: none of it is about your car, but all of it colours the impression.
This is a different problem from staging a property. With a room, you are often adding things to help a buyer imagine living there. With a car, you are almost always removing distraction so a single hard-edged object reads clearly. Our companion piece on real estate photo staging in the browser covers the property side; the pitfalls there are empty rooms and lighting, whereas here they are spoked alloys and glossy panels. Same instinct, very different subject.
The shot list buyers actually expect
Before you touch any editing, get the coverage. A car listing with three blurry photos taken at dusk looks like something to hide. Aim for a consistent set, shot in even light. An overcast morning is kinder to paintwork than direct sun, which blows out highlights and hides swirl marks buyers will find anyway.
Work through these angles:
- The hero shot: a three-quarter front, showing the front and one full side. This is your thumbnail. Make it count.
- Three-quarter rear: the opposite corner, so buyers can read the whole shape.
- Both straight side profiles: left and right, square on. This is where dents and panel gaps show, which is exactly why buyers want them.
- Straight front and straight rear: bumpers, lights, number plate area.
- Interior: dashboard, front seats, rear seats, and a clear shot of the odometer showing the mileage.
- Boot space, seats up and, if relevant, folded down.
- Engine bay, with the bonnet fully up.
- Wheels and tyre tread: a close-up per corner if the alloys are a selling point, or an honest one if a kerbed rim is not.
- The honest extras: service book, MOT paperwork, spare key, and clear photos of any damage.
That last point is not a suggestion. Photograph the scuffs, the stone chips, the tea stain on the back seat. A buyer who sees the flaw in the listing arrives ready to buy. A buyer who finds it on the driveway walks, and tells people.
The background clean-up workflow
Once you have sharp, well-lit shots, the fastest improvement is usually not a dramatic edit at all. It is a crop.
Open a photo in the image editor, straighten a wonky horizon, and crop tight so the car fills most of the frame with a little breathing room. Cropping out the bin and the neighbour's fence often does ninety per cent of the job with none of the risk. If a phone photo came out small or soft, the image upscaler can add resolution before you crop, so a tighter crop still holds up on a big screen.
When a crop is not enough (the clutter is right behind the car, or you want a plain, consistent backdrop across every shot), that is where cutting the car out on the background remover comes in. Everything runs on your own device; nothing about your car or your driveway is uploaded anywhere, which matters more than usual when your photos may carry your home address in their metadata or in the background itself.
Then place the cutout on a neutral backdrop. A plain mid-grey or soft gradient reads as tidy without pretending to be a showroom.
Where AI cutouts fight back on a car
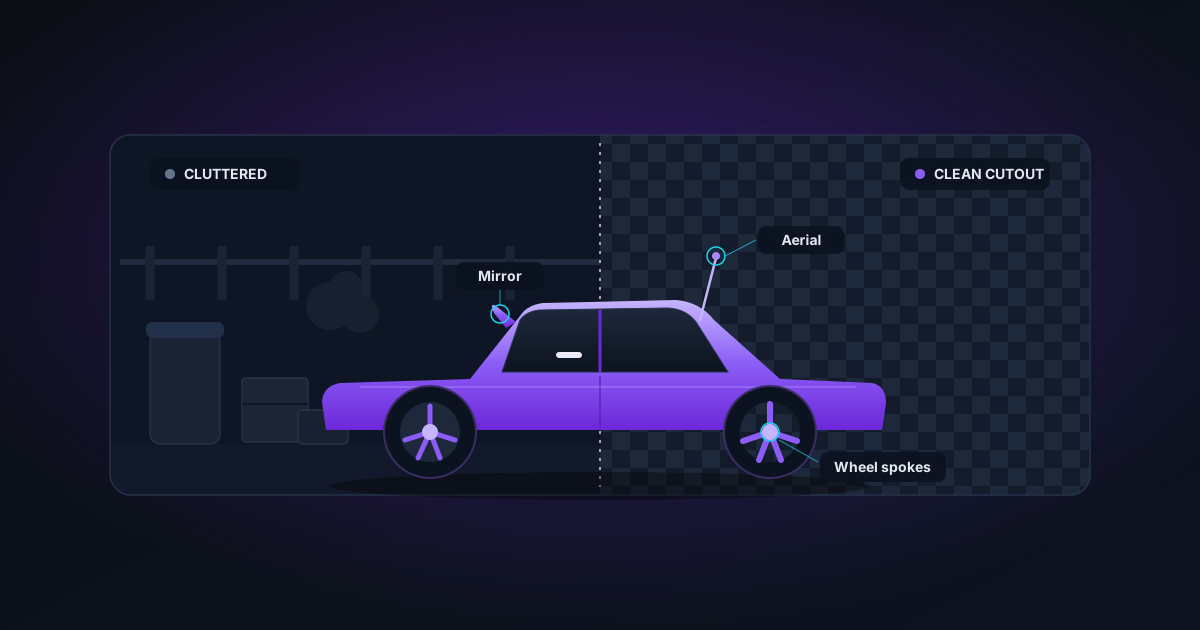
Be realistic here, because a whole car is one of the harder subjects an automatic cutout will meet. The body panels come away cleanly. The trouble is everything thin, shiny or full of gaps:
- Spoked alloy wheels, where you can see road, grass or fence through the gaps between the spokes. The matte often smears these into a solid blob.
- Wing mirrors and door handles, small shapes that reflect their surroundings and confuse the edge.
- Aerials and roof rails, thin details a model tends to trim off or leave ragged.
- Glossy paint and glass, which mirror the sky and the very background you are trying to remove, so the edge wanders.
Expect a clean line along the doors and a scrappy one around the arches and spokes. You can tidy the worst of it by hand in the image editor, but if you are spending twenty minutes rescuing one wheel, stop. The honest shortcut is almost always to reshoot rather than cut out: drive to an empty car park on a Sunday, a quiet industrial estate, or a plain wall, and let the real setting be the clean background. A genuine tidy backdrop beats a fought-over cutout every time, and it keeps the shadows and reflections consistent, which a paste-on background never quite manages.
One thing to avoid: dropping the car onto a fake polished showroom floor. The reflection underneath will not match the lighting on the car, buyers clock it instantly, and it reads as a dealer stock image rather than an honest private sale. Suspicion is the last thing you want in a listing.
The line you do not cross
Clean framing is fair. Misrepresentation is not, and with a vehicle the stakes are higher than a scruffy thumbnail.
Never use editing to hide damage. Do not clone out a dent, paint over a scratch, erase a cracked bumper or disguise mismatched panels that hint at a past repair. A background swap that happens to bury a crumpled wing is not a tidy background; it is a lie the buyer will discover on the test drive, and in many places a materially misleading private sale is a legal problem, not just an awkward one.
The test is simple. Ask whether your edit changes the buyer's understanding of the car itself, or only cleans up what is around it.
- Fine: cropping out the bins, replacing a chaotic street with plain grey, straightening the shot, brightening a dim exposure to show the true colour.
- Not fine: removing rust, smoothing a dent, hiding a warning light on the dash, faking a lower mileage, or editing the paint to a condition the car is not in.
There is one edit worth making for your own protection, not the buyer's: obscure the number plate before you post. Crop it out or blur it in the editor so your registration is not sitting on a public listing. That protects you and misleads no one.
Get the coverage, light it evenly, tidy the frame, and be plain about the flaws. A clean background sells the car. Honesty sells it twice, because the buyer who trusts your photos is the one who turns up with the cash.
Applies to NSS Background Remover v1.9.0 — the release that was current when this article was published.
Was this article helpful?
Your answer is saved in this browser only. This control makes no network request and does not send the answer to an NSS feedback endpoint.