Why Cutouts Get a Coloured Fringe, and What Edge Decontamination Does
That thin green or white halo around a cut-out isn't a bad cut, it's colour spill baked into the edge pixels. Here's why it happens and what edge decontamination does about it.
By Novus Stream Solutions Editorial Team · Part of the Image processing and on-device AI topic cluster
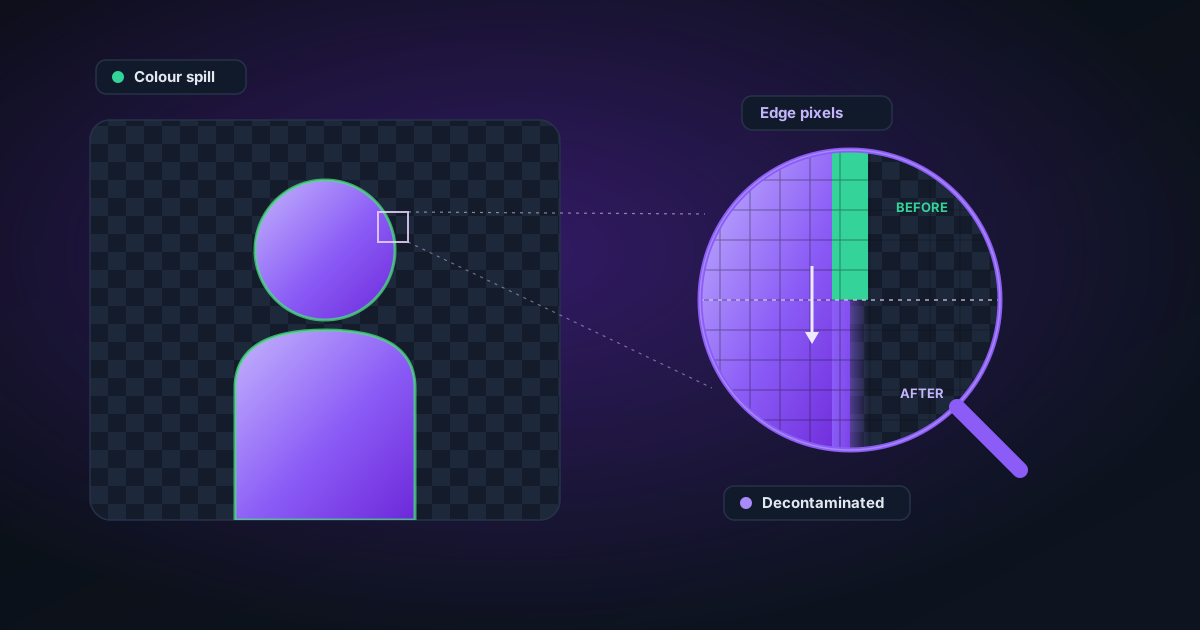
A portrait shot against a green screen, cut out cleanly, dropped onto a white product page, and there it is: a faint green rind tracing the shoulder and threading through the flyaway hairs. Zoom to 300% and the culprit is obvious. The pixels right on the boundary aren't skin, and they aren't background either. They're a muddy blend of both, and the blend is green.
That thin halo has a name in compositing work: spill, or edge contamination. It isn't a flaw in your cut so much as a fact about how cameras record edges. Understanding why it happens tells you exactly how to get rid of it.
An edge is never one pixel wide
Point a camera at a strand of hair and ask which pixels it covers. The honest answer is "partly, several of them." A sensor pixel integrates all the light falling on its little square. If half that square sees hair and half sees the green screen behind it, the pixel records the average of the two, a colour that is neither hair-brown nor screen-green but something in between.
This is not limited to hair. Any soft or fine edge (fur, feathers, motion blur, the fuzzy rim of an out-of-focus arm, the translucent edge of a glass) spreads the boundary across a band of mixed pixels. Each one is a weighted blend of foreground and background.
A good background remover doesn't try to force those pixels to be fully in or fully out. It assigns them a fractional transparency: this pixel is 40% subject, so its alpha is 0.4. That is what gives you soft, believable edges instead of a cardboard cut-out. Our background remover does exactly this, working entirely on your device.
But here's the catch. Getting the transparency right is only half the job.
The old background colour is baked into the pixel
Think about what a mixed edge pixel actually contains. The camera recorded a single colour for it: call it the observed colour. That observed colour is itself a mixture:
observed = (subject fraction × true subject colour) + (background fraction × old background colour)
For a pixel that's 40% hair against a green screen, roughly 60% of its colour is green screen. When a remover sets that pixel's alpha to 0.4 and stops there, it keeps the observed colour as the pixel's RGB. The transparency is now correct, but the colour still carries all that green.
You have made the pixel semi-transparent without removing the green that was mixed into it. The tint is sitting there, waiting.
Why it only shows up on a contrasting background
Here's the part that surprises people. On the original green background, you'd never see the fringe. The green edge pixels sit against green and vanish. The contamination was invisible because it matched its surroundings.
The moment you composite onto a new background, the maths changes. A semi-transparent green-tinted pixel gets blended with whatever is now behind it. Against white, that leftover green is suddenly the odd one out and reads as a halo. Against a dark background, a white-studio "glow", the same effect from a bright backdrop, shows up as a pale rim.
The rule of thumb: the fringe is as visible as the difference between your old and new backgrounds. Cut a subject from a white studio and drop it on a light grey page and almost nothing shows. Drop that same cut-out on a black hero banner and the white edge lights up. Green screen onto white is close to the worst case, which is why it's the textbook example.
This also explains a common frustration: the cut-out looks perfect on the editor's transparent checkerboard, then looks haloed the instant you place it. Nothing changed about your cut. You just gave the contamination a contrasting backdrop to argue with.
What decontamination actually does
Decontamination, also called spill suppression or colour unmixing, is the step that fixes the colour, not just the transparency.
It works backwards from the mixing equation. If you know the observed colour, you know roughly how transparent the pixel is (its alpha), and you can estimate the old background colour, then you can solve for the one remaining unknown: the pixel's true subject colour, with the background contribution subtracted out. Decontamination replaces the contaminated RGB with that estimated pure colour.
After decontamination, the 40%-hair pixel no longer stores "40% hair plus 60% green." It stores the best estimate of the hair's actual colour, at 40% opacity. Now when you composite it onto any background, it blends the hair colour with the new backdrop, no green passenger along for the ride.
This is a different problem from how the transparency itself is stored and multiplied through. If you want the deeper story on that, why an edge can look right in one app and wrong in another purely because of how alpha is packed, see straight versus premultiplied alpha. Spill is about the colour in the edge pixel; that post is about the bookkeeping of the transparency value.
What you can do about it
You have three levers, best used in order.
-
Shoot to avoid it. Contamination you never create needs no fixing. Put distance between subject and background so the backdrop falls out of focus and reflects less light onto your subject. Light the background separately and evenly. If you're not chroma-keying, a neutral mid-grey often spills less visibly than a saturated green or blue, because grey contamination is far less obvious against most new backgrounds.
-
Choke or feather the matte. Shrinking the cut-out mask inward by a pixel or two, a choke or defringe, simply eats the worst contaminated ring at the very edge. A light feather then softens what remains. You lose a sliver of the subject, which is fine on a shoulder and risky on fine hair.
-
Decontaminate. For soft edges you can't afford to trim (hair, fur, fabric wisps) colour unmixing is the proper fix. Where you're cleaning the boundary by hand, the image editor lets you work the edge and knock back a stubborn tint without flattening the whole cut.
A quick pre-composite checklist:
- View the cut-out against the final background colour, not the checkerboard, before you judge it.
- Look specifically at edges that meet the old background at a grazing angle: shoulders, hair tips, ear rims.
- If you see a consistent single-colour rim, that's spill, and a choke or a decontaminate will clear it.
- If the rim is dark and ragged rather than tinted, that's a matting error, not spill: a different fix.
When to stop and re-shoot
Be honest with a bad source. Decontamination is an estimate, and it needs something to work with. A pixel that is genuinely 90% saturated green screen barely contains any subject colour to recover. There is almost nothing left underneath the green to reconstruct. Blonde hair, white fur, glassware and veils shot against a strong colour are the classic unrecoverable cases: the translucent subject and the coloured background are so entangled that no amount of unmixing gives a clean result.
Two more limits worth stating plainly. Upscaling won't help: running a contaminated cut-out through an upscaler just renders a larger, sharper halo. And if the whole edge is soft because the shot is out of focus, no decontamination sharpens it; you're only unmixing a blur.
When the fringe survives a sensible choke and a decontaminate, that's your signal. Ten minutes re-shooting on a neutral, well-separated background beats an hour fighting green in post, and the second cut-out drops onto white without a word of complaint.
Applies to NSS Background Remover v1.9.0 — the release that was current when this article was published.
Was this article helpful?
Your answer is saved in this browser only. This control makes no network request and does not send the answer to an NSS feedback endpoint.