Resizing Video for Every Platform's Specs Without Losing Quality
Every platform wants a different frame size, and a careless resize adds black bars or squashes faces. Here is how to resize a video to each platform spec in the browser without re-compressing it into mush, and what the progress bar is actually doing.
By Novus Stream Solutions Editorial Team · Part of the Browser-local editing workflows topic cluster
You have one clip. TikTok wants it tall, YouTube wants it wide, and the feed square you saw a friend post is a different shape again. Resize carelessly and you get black bars top and bottom, or a subject squashed until faces look wrong. The clip is fine. The framing decision is what went missing.
This is a practical walk through resizing video to platform specs in the browser, with the video resizer. It runs on-device, so the clip never leaves your machine. But resizing is not a free operation, and the honest parts of that matter as much as the buttons. Let us go through the whole thing.
The platform matrix
Most of the specs you will ever need collapse into four aspect ratios. Pixel dimensions vary, and platforms nudge their recommendations over time, but the shape is the thing that decides how your subject sits in frame.
| Ratio | Shape | Where it lives |
|---|---|---|
| 9:16 | Tall portrait | Reels, TikTok, YouTube Shorts, Stories |
| 4:5 | Portrait, less extreme | Feed posts that want vertical reach |
| 1:1 | Square | Older feed grids, some ad slots |
| 16:9 | Wide landscape | YouTube, most desktop players, embeds |
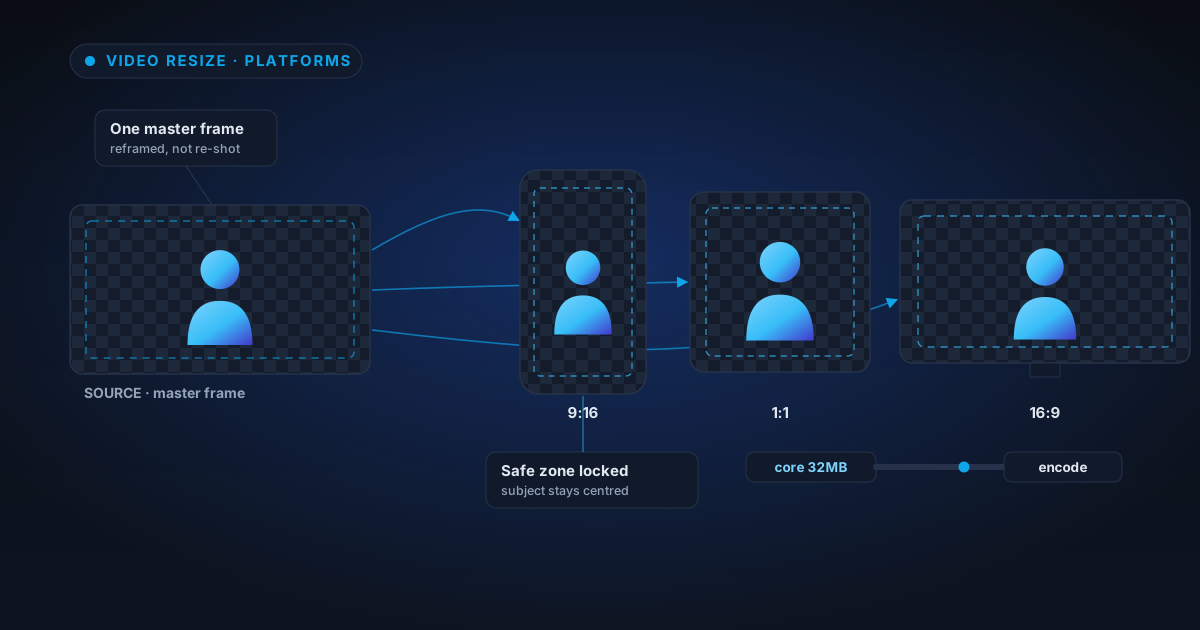
The trap is treating these as interchangeable. A 16:9 interview cropped straight to 9:16 loses two-thirds of its width. If your speaker was framed to one side, they can end up half out of shot. Going the other way, a 9:16 phone clip forced into 16:9, leaves tall pillar bars down each side unless you crop or fill.
So before you touch a single setting, know the target ratio and know where the important part of your frame is. Everything after that is choosing how to reconcile the two.
Fit, fill, or pad: the real choice
When the source ratio and the target ratio disagree, you have exactly three honest options. There is no fourth that magically keeps everything.
- Fit (letterbox / pillarbox): the whole frame is preserved and bars fill the gap. Nothing is cropped, nothing is stretched. You lose screen area to the bars. Fine when every part of the frame matters: a wide landscape, a chart, text near the edges.
- Fill (crop to fill): the frame is scaled up until it covers the whole target, and the overflow is cropped away. No bars, no distortion, but you lose the edges. This is the right call for most social resizes, provided your subject is near the centre.
- Pad: like fit, but the bars are a chosen colour instead of default black. Useful when a plain black border reads like a mistake and a solid colour reads as deliberate.
What you should almost never do is stretch to fit: scaling width and height by different amounts so the frame fills the target without cropping. That is where squashed faces and stretched logos come from. If a tool offers it, treat it as a last resort for abstract textures, not for anything with a person or straight lines in it.
A rule of thumb: fill for social, fit for anything informational. A talking-head reel wants fill so it uses the whole screen. A tutorial with on-screen text wants fit so nothing gets clipped.
Keep faces in the safe zone
Fill only works if the thing you care about survives the crop. On vertical platforms, the top and bottom of the frame are often covered by interface: captions, the account handle, the like and share rail. That eats into the visible area.
Frame with that in mind:
- Keep faces and key action roughly in the central band, away from the extreme top and bottom.
- If you know a clip is heading for 9:16, avoid composing the subject hard against the left or right edge: a fill crop from a wider source will push them further out.
- Check the result before you export. If a fill crop lops off the top of someone's head, switch to fit, or recompose in the video editor first and resize afterwards.
The resizer changes dimensions; it does not reframe intelligently or follow a subject around. That framing judgement is yours, and it is easier to make deliberately than to fix after the fact.
The honest note: resizing re-encodes
Here is the part a lot of tools skip. Changing a video's dimensions is not like cropping a photo. The pixels have to be scaled and the file written out again, which means the video is re-encoded. The resizer does this with ffmpeg compiled to run in the browser.
Re-encoding is lossy by nature. Every re-encode is a fresh compression pass, and each pass discards a little detail. One careful resize is not something viewers will notice. The problem is stacking passes: resize, then re-resize, then run it through something else, then resize again. That is when softness and blocky artefacts creep in.
So a few sensible habits:
- Resize once, as the last step. Do your cuts, colour, and background work first, then resize the finished clip to the platform spec. Do not resize early and re-edit later.
- If you need several aspect ratios, export each one from the same edited master rather than resizing a resize. Every version then has only a single re-encode between it and your edit.
- Do not resize purely to "shrink the file". Aggressive downsizing to save megabytes usually costs more in visible quality than it is worth.
This is the trade-off we would rather name than pretend away. Resizing is a re-encode; pick sensible settings and do it once.
Upscale first, then resize, if you are enlarging
If your target is bigger than your source, say you shot at 720p and need clean 1080p, resizing alone cannot add detail. Scaling a small frame up just enlarges the pixels you already have, and any softness comes with them.
The better order is to enlarge first with a dedicated tool, then resize the result to the exact target ratio. Two things to keep in mind:
- Video upscale is a classical enhancement pipeline (denoise, Lanczos scale, sharpen, levels) with Light, Balanced, and Strong presets. It is not AI and it cannot invent detail that was never captured, but a clean, sharpened enlargement is a far better thing to hand the resizer than a soft small frame. There is a fuller walkthrough in our video upscaling guide.
- Be realistic about what upscaling buys you. A soft 720p clip becomes a cleaner, larger clip: better than a raw stretch, but not magically sharp. It enlarges and tidies; it does not recover detail the camera never recorded. Set that expectation before you resize, not after.
Either way, the sequence matters: enlarge, then resize. Do it the other way and you are asking the resizer to stretch detail that is not there yet.
What the progress bar is actually doing
If you have used browser video tools before, you may remember a progress bar that shot to 5% and sat there while you wondered whether it had died. That is fixed, and it is worth knowing why, because the honesty is the point.
The first time you resize in a session, the tool downloads a ffmpeg core of roughly 32 MB: the actual engine that does the encoding. That download used to happen invisibly behind a stuck bar. Now it is shown as real progress: you see the core coming down, and only then does the encode begin as its own stage. Two honest steps instead of one misleading one.
A couple of practical consequences:
- The first resize in a session includes that one-time download. Later resizes in the same session skip it and start straight into encoding.
- If your file uses a codec the in-browser ffmpeg cannot read, it now fails fast with a clear message instead of grinding away and stalling. That is a feature, not a fault: a quick, legible error beats a silent hang. If you hit one, re-export your source in a common codec and try again.
Everything happens locally. The 32 MB is the engine, not your video going anywhere. Your clip stays on your device the whole time.
A sensible workflow, start to finish
Putting it together, the order that keeps quality intact:
- Edit first. Cut, composite, and correct in the video editor while the clip is still at full quality.
- Enlarge if needed. If the target is bigger than the source, run video upscale before you resize.
- Resize last. Take the finished master into the video resizer, pick the target ratio, and choose fit, fill, or pad deliberately based on where your subject sits.
- Check the crop. Confirm faces and key action survived, especially on 9:16.
- Export one version per ratio from the same master, not resizes of resizes.
Follow that and each platform version carries a single, careful re-encode, which is about as close to "without losing quality" as an honest video pipeline gets.
Ready to fit your clip to whatever the platform is asking for? Open the video resizer, pick your ratio, and choose your framing with a progress bar that finally tells you the truth.
Applies to NSS Background Remover v1.9.0 — the release that was current when this article was published.
Was this article helpful?
Your answer is saved in this browser only. This control makes no network request and does not send the answer to an NSS feedback endpoint.