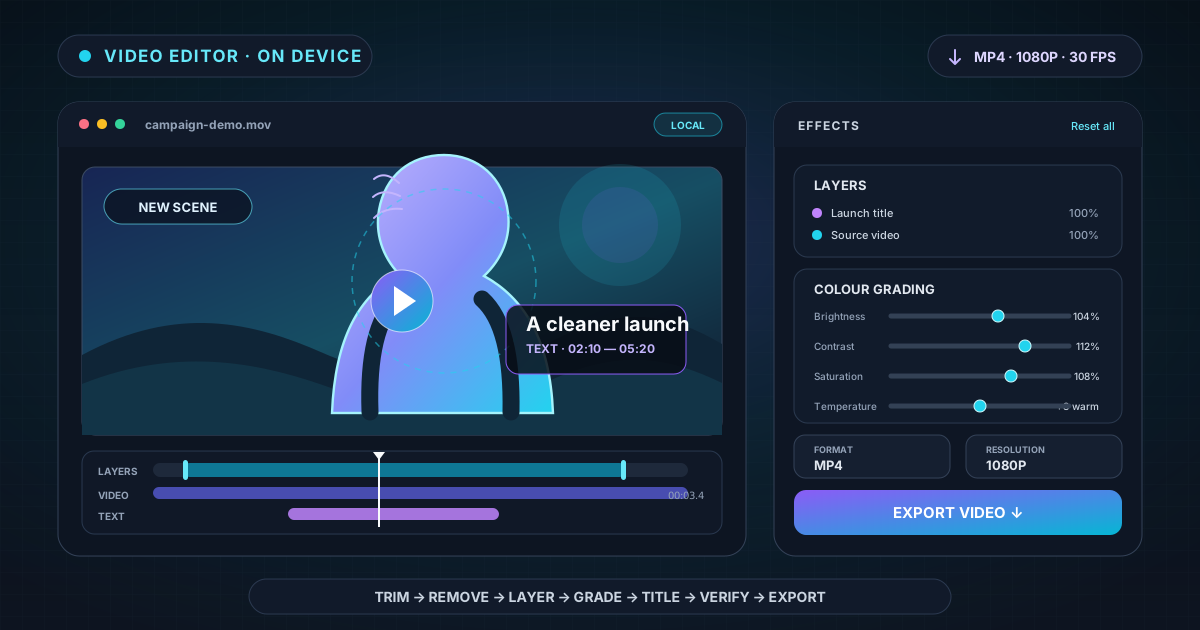
From Background Removal to Finished Video: A Complete Browser Editor Workflow
Turn a raw clip into a finished browser-edited video with NSS: trim the timeline, remove or replace the background, arrange layers, add timed text, colour grade, clean distractions, and choose export settings.
By Novus Stream Solutions Editorial Team · Part of the Browser-local editing workflows topic cluster
A background remover can produce a transparent clip. A finished video needs more decisions: where the clip begins and ends, what sits behind the subject, which information appears on screen, and which export will play where the audience watches it.
The NSS Video Editor does not require background removal first. Start with an ordinary MP4, WebM, or MOV and introduce transparency only when the idea needs it. Trim, background treatment, layers, text, grading, cleanup, and export all happen on your device.
Use the controls in production order: structure first, visuals second, encoding last. You will not polish frames you later cut, and expensive processing stays focused on visible footage.
Define the delivery before you edit the clip
Start by naming the job. A talking-head lesson, a product loop, a marketplace demo, and a social advertisement may use the same source video, but they do not need the same canvas or finish.
| Destination | Prioritise | A useful starting point |
|---|---|---|
| Website or product page | Clean composition and broad playback support | Short MP4 with a solid or branded scene |
| Social feed | Immediate subject, readable text, compact duration | Tight trim, bold text, 1080p or 720p |
| Presentation or training | Legibility and calm pacing | Original framing, restrained grade, timed labels |
| Reusable design asset | A clean separated subject | Transparent WebM from the removal workflow |
Decide whether you need the original background, a replacement scene, or a transparent asset—and whether the editor is making the final delivery or a reusable element. Do not flatten a subject onto a decorative scene if the next designer needs to place it elsewhere.
For a transparent deliverable, read exporting with transparency before choosing the format. For a finished composite, plan around MP4 or WebM playback.
Import and trim before running the expensive steps
Drop the source into the Video Editor. The editor accepts MP4, WebM, and MOV and opens ordinary opaque video directly; background removal is optional. Scrub through the full clip once before touching an effect. Find the first frame that communicates something and the last frame that still earns its place.
Drag the timeline in and out points around the useful range. Playback at 0.25× helps when checking a gesture, edge, or title cue; 2× helps find pauses. A shorter timeline tightens the story and gives later frame-by-frame operations less footage to process.
Make orientation and canvas decisions now. Utilities for rotate, resize, canvas extension, compression, conversion, and metadata removal stay inside the editor. Correct a sideways clip or wrong frame before placing text because a later canvas change invalidates positions.
Keep the untouched source separate from exports. Let a file such as demo-source.mov remain the source and the final download take the -edited name.
Decide whether the background should remain, disappear, or change
For colour grading, trimming, and text, leave the clip opaque. For a new scene behind a person, the foreground must first contain transparency. Choosing a solid colour, image, blurred original, or lifestyle scene does not place that content over an opaque clip; it composites it behind the clip and shows it through transparent pixels.
If you choose a background while the clip is opaque, the editor offers Remove background (People model). A roughly 15 MB one-time model download produces a transparent WebM. Because the recurrent model carries information between frames, its outline is designed to stay more consistent than unrelated still-image masks. See how the video background engine works.
Use removal deliberately. A presenter against a simple wall is a strong candidate; overlapping people, fast rotation, motion blur, and transparent props are harder. Preview a demanding section before committing to a replacement background.
Transparent WebM previews best in Chrome and Edge; support varies in other players. For broad playback compatibility, composite the finished background and export an ordinary MP4.
Build the scene from the back forward
Once the subject is separated, choose the background that serves the message rather than merely proving the old one is gone.
- Solid colour is dependable for explainers, profile clips, product listings, and brand systems. Check contrast with clothing, hair, and text.
- Uploaded image lets you use a campaign photograph, office, set, or custom graphic. Match its horizon and light direction to the source.
- Blurred original preserves the source colours and context while reducing distraction. It is often the most believable choice for a quick privacy-safe or shallow-depth look.
- Lifestyle scene creates a ready-made environment in the browser. Treat it as art direction: choose a scene whose perspective and scale agree with the subject.
Then open Layers. The pinned Source video row controls the base clip's visibility and opacity. Image, video, and text layers can sit above it; overlays can be reordered, hidden, locked, duplicated, blended, or given their own opacity. Build from large elements to small ones: background, subject, supporting media, then text.
A logo below an opaque video is invisible; a full-frame image above the presenter covers the presenter. When something disappears, inspect visibility, opacity, and stack order before re-importing it.
Establish one look with presets, then refine it
The Filter Presets section gives you one-click starting looks and an Intensity control. A preset changes the same core values exposed below it, so it is not a mysterious permanent filter: choose a direction, reduce or increase its strength, then fine-tune the result.
Use Brightness for exposure, Contrast for separation, and Saturation for colour intensity. Temperature moves the frame warmer or cooler; Tint corrects a green or magenta cast. Watch skin, white objects, and brand colours because they reveal an overdone grade quickly.
Full-frame Blur softens the complete composite; a blurred background only sits behind a transparent subject. Vignette darkens the outer frame. Fade in and Fade out can each cover up to five seconds, although a short clip may need only half a second.
Judge the grade at normal playback size. A dramatic preset can look attractive on one paused frame while making the whole clip tiring. The goal is continuity: the subject should remain recognisable from the first visible frame to the last.
Add text when the timing and composition are stable
Text overlays have their own content, font, size, colour, opacity, x/y position, and start and end times. That makes them suitable for a name strap, short instruction, feature callout, price, or closing action. Multiple overlays can occupy different ranges instead of forcing every message onto the screen at once.
Keep titles short enough to read on a phone and away from edges where platform controls or cropping may intrude. Place type against predictable contrast; if the background changes dramatically, split the message or change the scene.
Add text after trimming because its time range is tied to the edited sequence. Play through every entrance and exit instead of checking only the middle. A label that arrives one second late feels like an editing error even when its typography is perfect.
Remove only the distractions that matter
The Object remover is useful for a logo, plate, or small unwanted item that would otherwise spoil a clean frame. You can click an object for SlimSAM selection, draw a box, or use the licence-plate detector, then remove, blur, or pixelate the selected area across the whole clip or the trimmed range.
This is targeted cleanup, not unrestricted reconstruction. Tracking follows movement, but not arbitrary rotation or scale; when confidence is lost, it freezes and flags the edit. Removal works best when nearby frames reveal the background or it stays still. An optional LaMa patch helps with areas that never become visible, but requires a separate, consent-gated download of roughly 196 MB.
Use the least ambitious treatment that works. Blurring a moving plate is often more robust than inventing the road behind it. Review the full range and revert a repair that attracts more attention than the distraction.
Perform a full-playback quality check
Before export, stop making changes and watch the trimmed clip from beginning to end at normal speed. Check the story first, then make a second pass for technical details:
- Does the first frame begin cleanly, without a stray setup moment?
- Does a replacement background show through every intended transparent area?
- Do hair, hands, and moving edges remain stable in the busiest section?
- Are overlay layers visible in the right order and only for the right duration?
- Is text readable on the smallest likely display?
- Do the grade, vignette, and fades help rather than announce themselves?
- Does every object-removal edit stay attached to its target?
Scrub the exact in and out points too. Playback can hide one bad frame, while still inspection can exaggerate defects nobody sees in motion. You need both views.
Export for the audience, then verify the actual file
The export panel offers MP4 or WebM, Original, 1080p, 720p, or 480p resolution, and 30, 24, or 15 frames per second. Start with the source frame rate and a resolution no larger than the useful source. Upsizing a soft 720p recording to 1080p creates more pixels, not more captured detail.
Choose MP4 for a finished composite when broad support is the priority, and WebM when it fits the destination. An MP4 request can fall back to WebM when H.264 recording is unavailable; the downloaded extension identifies what was produced.
Rendering happens locally, so longer, higher-resolution, higher-frame-rate jobs take more time and memory. Keep the tab open, then play the download and confirm duration, frame size, text timing, background, and destination compatibility.
That final replay closes the loop: define the delivery, trim the source, introduce transparency only when needed, build the scene, create one look, add timed information, clean distractions, and verify the export. The result is a finished video, built privately in the browser.
Applies to NSS Background Remover v2.3.0 — the release that was current when this article was published.
Was this article helpful?
Your answer is saved in this browser only. This control makes no network request and does not send the answer to an NSS feedback endpoint.