Making Animated GIF Stickers With Clean Transparency
Animated GIF stickers live or die on their edges. Here is how to cut a clean, transparent animated sticker for messaging and marketing in the browser, plus the one hard truth about GIF transparency, and when to reach for APNG instead.
By Novus Stream Solutions Editorial Team · Part of the Browser-local editing workflows topic cluster
A good animated sticker has to do a lot with very little. It sits in a chat bubble at maybe 128 pixels wide, loops forever, and still has to read at a glance: a wave, a thumbs-up, a bouncing logo. The background has to be gone, and gone cleanly, because a stray fringe of the old backdrop looks worse at sticker size than it ever did full-frame.
This is a hands-on guide to cutting animated GIF stickers with transparency using the revamped GIF background remover. It also covers the one hard limit of the GIF format that no tool can engineer around, and what to do instead when that limit gets in your way.
What actually makes a sticker work
Before touching the tool, it helps to know what you are aiming for. A sticker that lands well tends to share three traits.
- It is legible at tiny sizes. Fine detail vanishes when the image is scaled down to chat dimensions. Bold shapes and strong contrast survive; thin lines and subtle texture do not.
- It has clean edges against any background. Your sticker will land on a white chat, a dark chat, a photo wallpaper. You do not get to choose. A halo or a coloured fringe that was invisible on one background screams on another.
- It loops without a jolt. If the first and last frames do not line up, the eye catches the seam on every repeat. That is a property of the source animation, not the cutout, so pick or trim a clip that already loops before you start.
The transparency work handles the second point. The first and third are yours to get right in the source GIF.
The workflow, step by step
Open the GIF background remover, drop in your animated GIF, and the tool works through it frame by frame. There are two paths it can take, and which one runs depends on your source.
- Colour-key fast path. If your GIF already sits on a solid, flat background (a single green, a plain white) the tool keys that colour out first. This is quick and exact, because there is no guessing involved: the background is one known value.
- Per-frame model path. For busy or photographic backgrounds, it falls back to the same Fast and Best Quality model ladder used for still images. Fast is a small, quick model; Best Quality is slower but holds edges better. Same choice you would make on the image background remover. Best Quality is worth the extra wait when edges matter, and for a sticker they almost always do.
Because each frame is cut separately, independent frames can wobble, an edge that sits one pixel out here, another pixel out there, flickering as the loop plays. To counter that, the tool applies temporal smoothing across frames, so the cutout stays consistent from one frame to the next rather than shimmering. For an animation that repeats endlessly, that stability is the difference between a clean sticker and a jittery one.
Once the frames are processed, you choose an output format. And this is where the honest part of the tutorial begins.
The one hard truth about GIF transparency
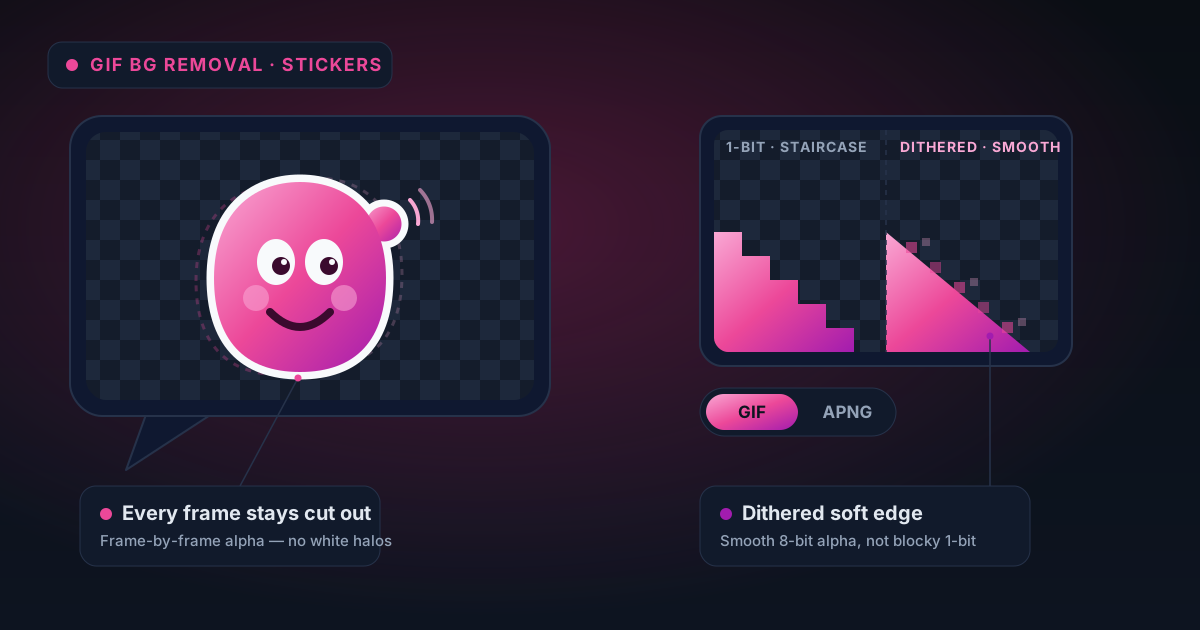
Here is the trade-off, stated plainly rather than glossed over: the GIF format only supports 1-bit alpha. Every single pixel is either fully opaque or fully transparent. There is no in-between. No pixel that is 60% there. Partial transparency simply cannot be stored in a GIF.
For hard-edged subjects (a logo, a solid icon, a bold cartoon character), this is fine. The edge is a clean boundary, and a hard on/off cutout represents it perfectly.
For soft edges it is a real problem. Wispy hair, motion blur on a moving limb, a fuzzy plush toy, a feathered glow. All of those rely on pixels that are partly transparent to blend smoothly. Force them to be either fully on or fully off and you get a jagged, aliased edge or a chewed-up fringe. No setting fixes this, because it is the format, not the tool. A GIF that needs soft edges is a GIF asking for something the container cannot hold.
The tool gives you two mitigations that make the best of 1-bit alpha, and one escape hatch that avoids it entirely.
Mitigation one: Bayer dithering on the edge band
Instead of drawing a single hard line where the cutout ends, the tool can dither the ambiguous edge band, the ring of pixels that were partly transparent. Using a Bayer pattern, it scatters opaque and transparent pixels in a fine checker across that band, so at a distance the eye reads a gradient even though every individual pixel is strictly on or off.
Dithering trades a crisp-but-jagged edge for a softer-but-speckled one. At sticker size, where the whole thing is small anyway, the speckle often reads as a natural soft edge and the result looks kinder than a hard cut through hair. It is not true softness, nothing in a GIF can be, but it is a convincing stand-in.
Mitigation two: a matte colour for a known background
The second mitigation works when you do know where the sticker will live. If your sticker is destined for a chat with a consistent bubble colour, or a marketing banner with a fixed background, set a matte colour to match it.
The matte pre-composites the soft edge against that colour before flattening to 1-bit alpha. The half-transparent fringe pixels get blended into the matte colour rather than left to fend for themselves, which kills the halo, on that background. The catch is that it only looks right on that background. Put a sticker matted for a white bubble onto a dark theme and the old white fringe reappears. Match the matte to the destination and it is invisible; guess wrong and it is obvious.
A rough guide to which lever to pull:
| Your situation | Best choice |
|---|---|
| Hard-edged logo or solid icon | Plain 1-bit cutout, no mitigation needed |
| Soft edges, destination background unknown | Bayer dithering |
| Soft edges, destination background known and fixed | Matte colour matched to it |
| Soft edges, you want them to actually stay soft | Export APNG instead (see below) |
When to just export APNG instead
If clean soft transparency matters more than universal GIF support, stop fighting the format and switch. The format picker offers GIF, APNG, and PNG-ZIP, and APNG is the honest answer for feathered edges.
APNG carries full 8-bit alpha, 256 levels of transparency per pixel, so hair, glow and motion blur survive with real smoothness. It is encoded client-side in the browser, and modern browsers render it natively. Support inside messaging and social apps varies, though, so check that your target platform accepts APNG before you commit to it. The frame-by-frame processing is identical; only the container changes.
The decision comes down to where the sticker is going:
- Choose GIF when you need the broadest possible compatibility and your subject is hard-edged, or when dithering and a matte get you close enough.
- Choose APNG when soft edges are the whole point and your destination app supports it.
- Choose PNG-ZIP when you want every frame as a separate file to drop into another editor or animation pipeline.
If you are unsure which containers your target platform accepts, our rundown of PNG vs WebP vs AVIF for transparency covers how these formats handle alpha and where each is safe to use.
Sizing and looping tips
A few practical things that decide whether the sticker feels finished.
- Keep the source animation short and loop-clean. Trim so the last frame flows back into the first. A visible seam is far more distracting once the background is transparent and there is nothing to hide it.
- Design for the small view. Preview at chat size, not full size. If the gesture does not read at 128px, simplify it, fewer, bolder movements beat busy detail that turns to noise.
- Mind the frame count. GIFs balloon in file size with more frames and more colours. Every transparent-edge dither pattern also costs palette entries. Fewer frames and a restrained palette keep the file light, which matters when a platform caps sticker size.
- Match your matte to the real destination, not to the editor's checkerboard. The transparent preview is a convenience; the chat bubble is the truth.
For the broader craft of building a cutout that works as a small graphic (cropping, padding, framing), the walkthrough on making social cutouts, stickers, emojis and avatars pairs well with this one. And if your target is specifically a Twitch or Discord emote, where tiny sizes and clean edges are the entire brief, the emote prep guide goes deeper on that use case.
Try it
The honest summary: GIF is a universal, widely-supported format with one real constraint, and the revamped tool gives you the fast paths, the temporal smoothing, and the dither-and-matte mitigations to work with that constraint, plus an APNG exit when the constraint is the wrong fit. Drop your animation into the GIF background remover, try Best Quality with dithering first, and if your edges are too soft to survive 1-bit alpha, switch the format picker to APNG and keep them.
Applies to NSS Background Remover v1.9.0 — the release that was current when this article was published.
Was this article helpful?
Your answer is saved in this browser only. This control makes no network request and does not send the answer to an NSS feedback endpoint.