Batch Cutouts and ZIP Export for a Whole Store Catalogue
Cutting out one product photo is easy; doing three hundred consistently is a workflow. Here is how to run a whole store catalogue through background removal in the browser and export every cutout as a single ZIP, with the queue doing the repetitive part.
By Novus Stream Solutions Editorial Team · Part of the Browser-local editing workflows topic cluster
A single clean cutout is easy to admire. Forty of them, lined up in a shop grid, are where the real work shows, because the eye stops looking at any one product and starts reading the set. If one photo sits on pure white, the next on a faint grey haze, and a third has a sliver of the old background clinging to a handle, the whole page starts to feel homemade. Not because any individual image is bad, but because they don't match.
This is a tutorial about matching. Running a whole catalogue through background removal in one pass, keeping every result consistent, and pulling the lot down as a single ZIP, all of it on your own machine, with nothing uploaded. Let's walk through it the way you'd actually do it on a Tuesday afternoon with a folder of product shots and a deadline.
Why a catalogue is a different job to a cutout
When you remove the background from one image, you judge it on its own. When you build a catalogue, you're really judging difference. A storefront, a marketplace listing, a printed line sheet. They all put products side by side, and inconsistency is the thing shoppers register first, usually without knowing why.
The mismatches that read as amateur are boring and specific:
- One shot on white, the next left transparent, so they sit differently on the page.
- Subjects at different scales: one mug fills the frame, the next floats tiny in the middle.
- Uneven padding, so some products kiss the edges and others swim in space.
- Stray background fringing on the tricky ones (hair, wire, mesh, glass) while the simple ones came out clean.
None of these is hard to fix. The trick is deciding the rules before you start, then applying the same rules to every image, so you're not making a hundred small aesthetic judgements one at a time. Consistency isn't a polish step at the end. It's a decision at the front.
Set your rules before you drop the folder
Five minutes of decisions here saves you an hour of re-runs. Settle these first:
- Transparent or white? Transparent PNGs are the flexible master. They drop onto any background later. But many marketplaces want a solid white backdrop. Decide the final need. You can always composite a transparent cutout onto white afterwards; you can't cleanly pull white back out.
- One mode for the whole set. Pick a single Background Remover mode and use it for everything in the batch. Best Quality (BiRefNet-lite) gives the most accurate edges and is the right default for a catalogue, because it handles the awkward products without you babysitting each one. Mixing Fast and Best across a set is exactly how you get a grid where some edges are crisp and some are soft.
- One output size. Every image should land at the same dimensions. More on this below with the image resizer.
- One padding rule. Same margin of empty space around every subject, so products feel like the same distance from the camera even when they aren't.
Write these down if you have to. The whole point of batch work is that you stop deciding and start applying.
The queue workflow
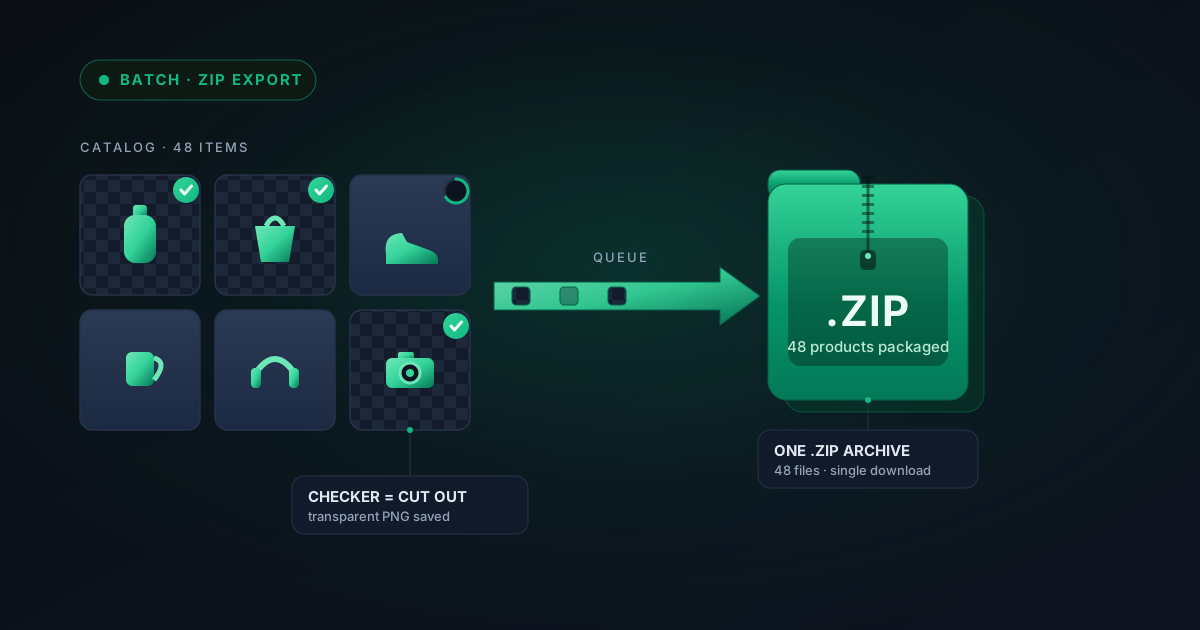
Here's the actual run. Open the Background Remover and drop the whole folder in at once. The queue takes many images and works through them together.
- Load the set. Drag the folder (or select all the files). They queue up together.
- Pick your one mode. Best Quality for a mixed catalogue. Leave it there for the entire batch. This is the consistency decision from above, made once.
- Let it churn. The queue processes image after image on your device. You don't need to sit on it; go make coffee. Because everything runs locally, there's no upload wait and no per-image round trip to a server.
- Spot-check the hard ones. You don't need to inspect all hundred. You need to inspect the awkward ones: anything with hair, fur, wire, mesh, transparent packaging, or a busy original background. Those are where edges get uncertain.
For the awkward ones, two features earn their keep. If a result looks uncertain (background left behind, or soft muddy edges), the tool will suggest retrying in Best Quality with a one-click Retry Best Quality. It flags it and offers; it never silently swaps the model on you, so what you see is always the mode you chose. And the Refine edges second pass has two presets: Softer for hair and fabric, Crisper for hard product edges like a bottle or a boxed item. A watch strap and a wig want opposite treatments: refine each to suit, then move on.
If a product has genuinely see-through parts (a glass, a clear plastic bottle, a jar), reach for Glass mode. It's a post-processing pass that preserves see-through interiors rather than punching them out as background, so the drink inside the glass survives.
Keep the set the same size
Consistent dimensions are half of "looks professional", and background removal on its own won't give you that. A 3000px shot and a 1200px shot come out cut cleanly but different sizes. Run the finished cutouts through the image resizer to normalise them.
Decide a target before you start. A rough guide for common needs:
| Where it's going | Sensible target | Notes |
|---|---|---|
| Marketplace listing | Square, e.g. 2000 × 2000 | Many platforms want square + white |
| Your own storefront grid | Square or 4:5 | Pick one aspect ratio, keep it |
| Printed line sheet | Match your template's cell | Consistency matters more than size |
Same dimensions, same aspect ratio, same padding rule applied to all of them. That's what makes a grid read as one shoot rather than a scrapbook.
Export all as ZIP
Once the queue is done, you don't save cutouts one file at a time. Export all as ZIP bundles every result into a single download. One file to keep instead of clicking through a hundred separate saves. Give your source files a tidy, ordered naming scheme before the run and unpacking stays easy, so matching cutouts back to the right products and SKUs doesn't turn into a guessing game.
One honest note worth stating plainly: there used to be a crash that could hit ZIP export on large batches. That's been fixed this cycle, so big sets now bundle and complete. If you tried this a while ago and got bitten, it's worth another run.
Because the editors are one-time-use, nothing is stored on a server or kept in the browser between sessions, that ZIP is your one chance to keep the work. Download it, check it, then the session's gone. Get the files onto disk before you close the tab.
The honest limit: it runs on your device
Here's the trade-off, stated straight rather than hidden. All of this runs on your own hardware. That's the whole reason your images never leave the machine. The flip side is that a genuinely huge set takes genuine time and memory. There's no server farm quietly absorbing the load; it's your CPU, your GPU, your RAM.
So work in sensible chunks. A few hundred images in a sitting is fine on a capable machine. A few thousand in one go, on a modest laptop, will crawl or run the tab out of memory. Split the catalogue into batches of a manageable size, export a ZIP per batch, and you keep everything responsive. We wrote up the memory side of this in more depth in batch-processing hundreds of images without crashing. Worth a read if your set is large. Chunking isn't a workaround for a weakness; it's just how you use a local tool well.
Handing off to a listing workflow
The ZIP is a means, not the end. Once you've got a folder of consistent, correctly-sized cutouts, the rest of the catalogue pipeline gets easier:
- Matching to SKUs is far easier when your source files were named or ordered sensibly before the run and your cutouts all share the same shape.
- Compositing onto white or a branded backdrop is a batch step you do once, on transparent masters.
- Dropping into a template (line sheet, storefront grid, listing manager) goes fast when every image is the same shape.
If you're going deeper on the product-photo side specifically, batch-processing product photos covers the shooting-to-cutout flow, and building a consistent product catalogue gets into keeping a whole range visually coherent once the cutouts exist. Background removal is the first clean step; those pieces take it the rest of the way.
Get your catalogue moving
The short version: decide your rules up front, pick one mode for the whole set, spot-check the awkward ones, normalise the sizes, and pull it all down as one ZIP. Consistency is a decision you make once and apply to everything, not a hundred small judgements.
Drop your folder into the Background Remover and let the queue do the churning. It runs on your device, your images stay with you, and when the ZIP is on disk the job's done.
Applies to NSS Background Remover v2.1.0 — the release that was current when this article was published.
Was this article helpful?
Your answer is saved in this browser only. This control makes no network request and does not send the answer to an NSS feedback endpoint.