Fast, Best Quality, or Glass? Choosing the Right Removal Mode
Fast, Best Quality, or Glass. The background remover gives you three modes, and picking well saves you re-doing the job. Here is a plain decision guide for which one fits which photo, what each is actually good at, and when to escalate.
By Novus Stream Solutions Editorial Team · Part of the Product, privacy, and trust topic cluster
The background remover gives you three modes, and the most common question we get is a fair one: which one should I actually click? People tend to reach for whichever sounds strongest, run everything through it, and then wonder why the tab is chewing through memory on a stack of simple product shots.
This is a decision guide, not a sales page. Most of the time the fast option is the right one, and we would rather you know when it is than default to the heavy model out of caution. Here is how to pick, and how the tool now helps you pick without you having to think about it too hard.
The three modes at a glance
Each mode is doing a different job. They are not "small, medium, large" versions of the same thing.
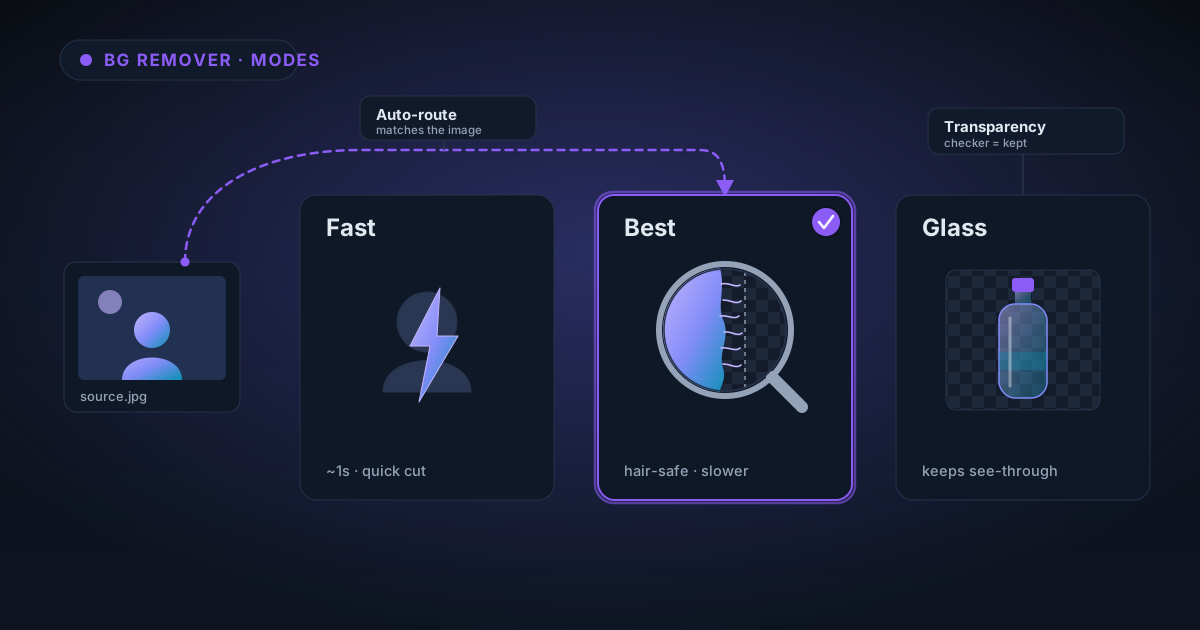
- Fast: a small, quick model. It handles subjects that are already easy to separate: a person against a plain wall, a product on a white sweep, anything with clear contrast between subject and background. It downloads quickly and runs quickly, which matters when you have a queue.
- Best Quality: this is BiRefNet-lite. It is slower and it is the one to reach for when edges are the whole problem: hair, fur, frayed fabric, foliage, a subject that half-blends into a busy background. It is more accurate at exactly the boundaries where Fast gets vague. On machines without WebGPU it runs on WASM, which is slower again, more on that trade-off below.
- Glass: not a separate model at all. It is a post-processing pass that preserves see-through interiors: the inside of a wine glass, a clear plastic bottle, a pair of glasses. Ordinary removal treats those transparent regions as background and punches a hole straight through them. Glass mode keeps them.
If you want the mechanics of what "removal" is actually doing under the hood, how AI background removal actually works covers the pipeline. The short version: the model produces a mask, and better models produce better masks at the hard edges.
Pick by subject
Most decisions collapse to what you are cutting out. This table covers the common cases.
| Your subject | Start with | Why |
|---|---|---|
| Portrait, hair, fur, feathers | Best Quality | Fine strands are exactly where BiRefNet-lite earns its cost |
| Simple product on white or plain background | Fast | High contrast, clean edge, the small model nails it and finishes sooner |
| Glass, clear plastic, anything see-through | Glass | Preserves the transparent interior instead of filling it in |
| Busy or low-contrast background | Best Quality | The subject blends into the background; the small model gets uncertain |
| Hundreds of images at once | Fast first | Run the batch quickly, then escalate only the ones that failed |
That last row is the one people get wrong most often. If you have a large batch, do not put the whole thing through Best Quality on principle. Run it on Fast, look at the results, and re-do only the handful where the edge went soft. You will save a lot of time and compute, and the failures are usually obvious at a glance.
Why "start Fast, escalate the failures" beats defaulting to Best
The instinct is understandable: pick the most accurate model, use it for everything, never think about it again. The problem is that Best Quality is not free. BiRefNet-lite is a larger model. It takes longer to download the first time, and it takes more compute per image every time. On a machine without WebGPU it falls back to WASM, and the gap widens further.
So if you push a queue of easy product shots through Best Quality, you pay that heavier cost on every single one. For images the small model would have cut out perfectly. The accuracy you bought made no difference on those, because there was nothing hard about them.
The honest framing is this: Best Quality is worth it precisely when the edges are hard, and wasted when they are not. Fast is not a lesser tool; it is the right tool for a large share of real work. We would rather you match the mode to the subject than treat "Best" as a safety blanket.
We wrote separately about why the best model runs on WASM at all, and what that means for speed on machines without a modern GPU. Worth a read if your results feel slow: why Best Quality background removal runs on WASM.
How the tool helps you choose
You do not have to get the mode right on the first try, because the tool watches the result and tells you when it looks uncertain.
If a cutout comes back with background left behind, or with soft, uncertain edges where the model could not commit, you will see a suggestion to retry in Best Quality, a one-click Retry Best Quality button. This matters, so we will be precise about it:
- The tool suggests. It does not silently switch models behind your back. If Fast gives you a clean result, nothing changes and you keep the fast path. You always know which model produced the image in front of you.
- The suggestion only appears when the result genuinely looks uncertain, so it is a real signal rather than a nag on every image.
This is the practical version of "start Fast, escalate the failures". The tool flags the failures for you, so you do not have to eyeball every image in the batch by hand.
Refine edges: the last mile
Once you have a mask you are mostly happy with, there is a second pass called Refine edges with two presets:
- Softer: for hair and fur. It feathers the boundary so fine strands read naturally instead of ending in a hard chop.
- Crisper: for hard product edges. It tightens the boundary so a bottle or a box has a clean, definite line with no fringe.
Reach for Refine edges when the model got the subject right but the very edge is not quite the texture you want. A portrait that is nearly right but has a slightly ragged hairline is a Softer job. A phone case with a faint halo is a Crisper job.
Worth understanding: a mask can be correct in shape and still look slightly cut out, because the edge is where segmentation and matting part ways. If your results have that "pasted-on" quality even when the outline is right, segmentation vs matting, why good masks still look cut out explains what is happening and why the Softer preset exists.
A quick worked example
Say you are prepping a product catalogue: two hundred items on a white sweep, plus a dozen lifestyle portraits, plus a few glassware shots.
- The products go through the batch queue on Fast. They are high-contrast on white; the small model handles them and finishes far sooner than Best would. When they are done, Export all as ZIP bundles every cutout into one download. (If you have hit a crash on ZIP export before, that was a bug this cycle fixed, it holds now.)
- The portraits go through Best Quality, because hair is the one thing Fast reliably struggles with. Add a Softer refine pass on any that need it.
- The glassware goes through Glass mode so the transparent interiors survive instead of turning into holes.
Three modes, three jobs, no wasted compute. That is the whole idea. The point is not that one mode is better than another. It is that each is built for a different kind of edge, and matching the mode to the subject is what keeps a big job fast without giving up the quality where quality actually matters.
It all stays on your device
Whichever mode you pick, none of it leaves your machine. The models run on-device through WebGPU, falling back to WASM where WebGPU is not available. The weights download once and are cached, so your second visit starts without waiting on that download again. Your images are never uploaded, there is no account, and there is no server in the processing loop.
The editor is one-time-use by design: nothing is saved on a server or held in the browser between sessions. You open the tool, do the removal, download the result, and when you close the tab the session is gone.
The short version
- Fast for easy, high-contrast subjects and for bulk. Start here.
- Best Quality (BiRefNet-lite) for hair, fur, fine edges, and busy backgrounds. Slower, heavier. Spend it where the edges are actually hard.
- Glass for anything see-through.
- Let the tool flag the uncertain results and offer Retry Best Quality: do not pre-emptively run everything through the heavy model.
- Finish with Refine edges (Softer for hair, Crisper for hard edges) when the last millimetre matters.
Pick a subject, pick the matching mode, and adjust only when the result tells you to. Open the background remover, drop in an image, and start on Fast. The tool will tell you if it is time to reach for something stronger.
Applies to NSS Background Remover v2.2.0 — the release that was current when this article was published.
Was this article helpful?
Your answer is saved in this browser only. This control makes no network request and does not send the answer to an NSS feedback endpoint.